If you’ve got a large portfolio of websites, then keeping track of them can be tricky. Sometimes the name of the website alone doesn’t provide all the info you need and can make various maintenance and management tasks hard. You can use Labels to make organizing your sites a lot easier.
To assign or update labels to existing websites:
Adding labels from the Websites screen:
- Navigate to your Websites screen.
- Locate the website you wish to add labels.
- Click Add Labels or Edit Labels.
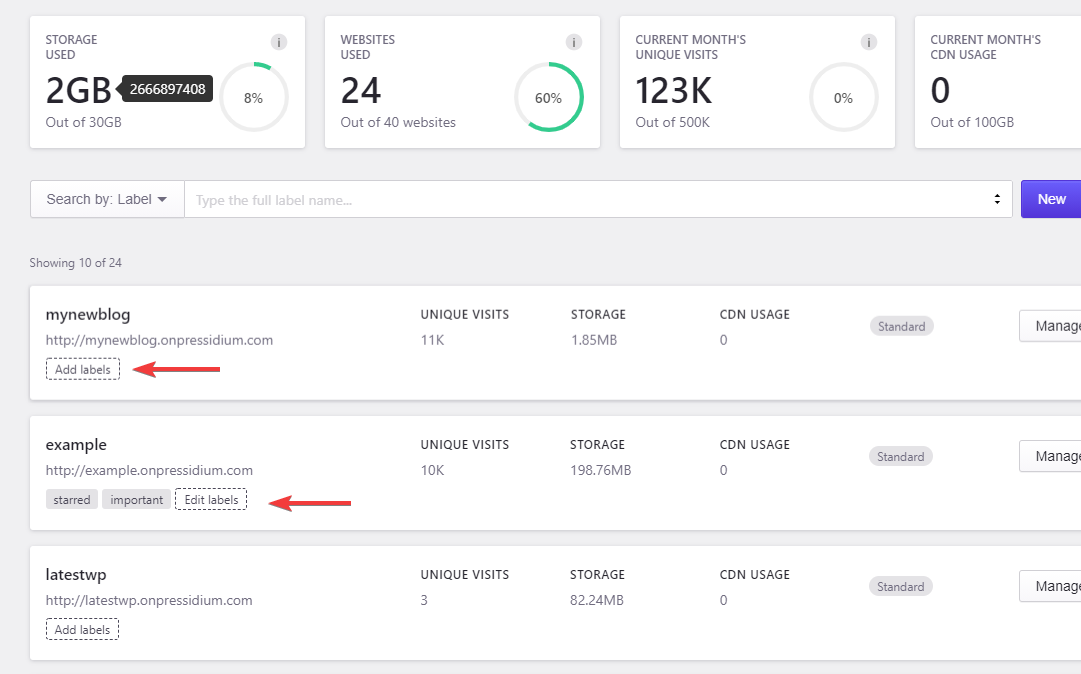
- You can add up to 10 different labels using the provided input box. Each label name can be up to 30 characters long and can contain numbers, letters and dash (“-“). Type the label name and press Tab to easily add multiple labels, use the (X) icon next to each label to remove it.
- To save your changes click Save Changes.
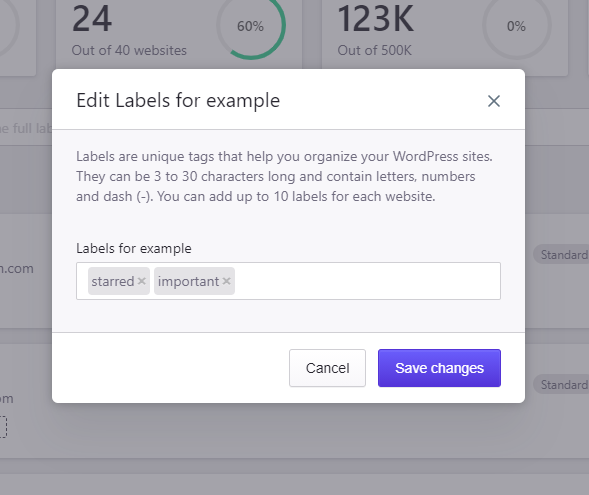
The labels assigned to a website will be visible in the websites list.
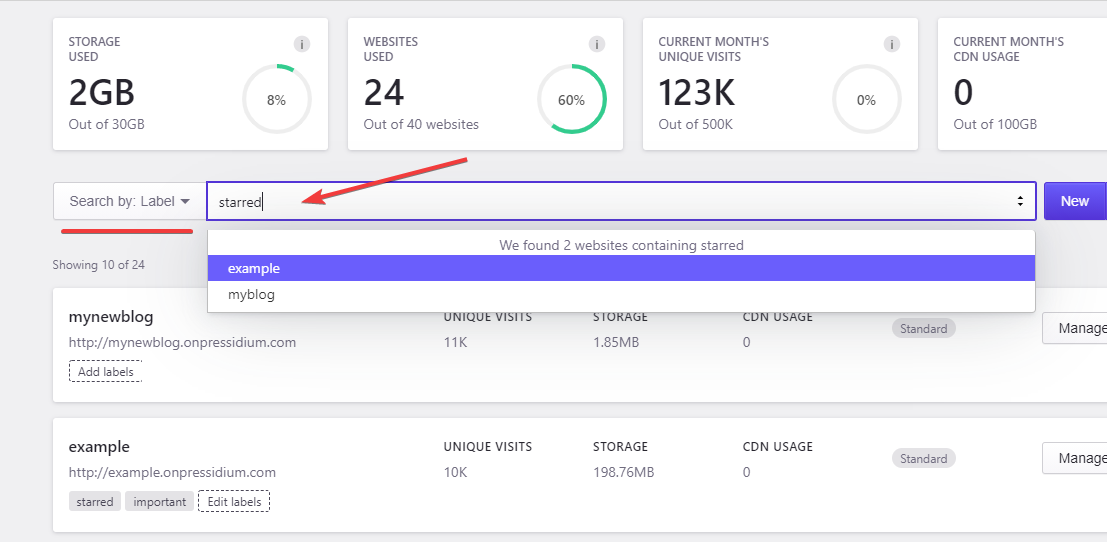
After you added labels to one or more websites you can use the Search By: Label
search box to find websites that have a specific label assigned. Use the full label name and keep in mind that search is case sensitive so searching for starred will not match websites labeled as STARRED.
Adding labels from the Website Overview screen:
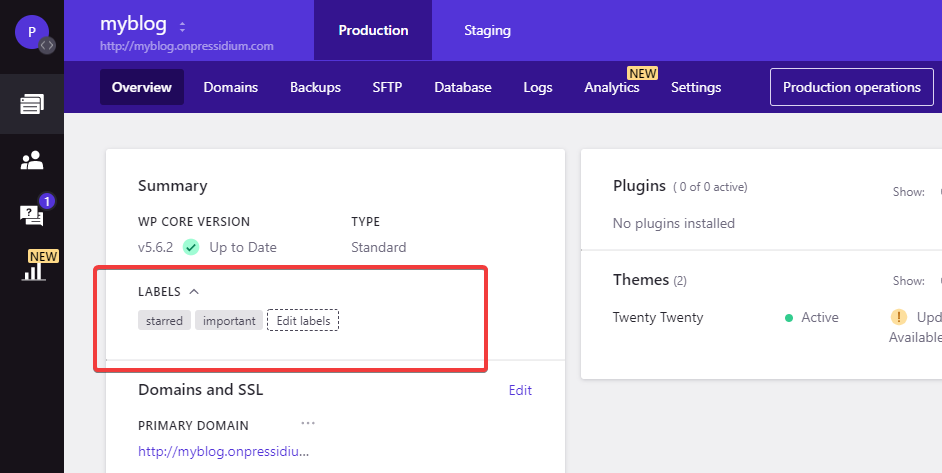
- Head to your website Overview page.
- Expand the Labels section on the Summary pane.
- Click Add labels or Edit labels
- Add or update labels using the related input box.
- To save your changes click Save Changes.
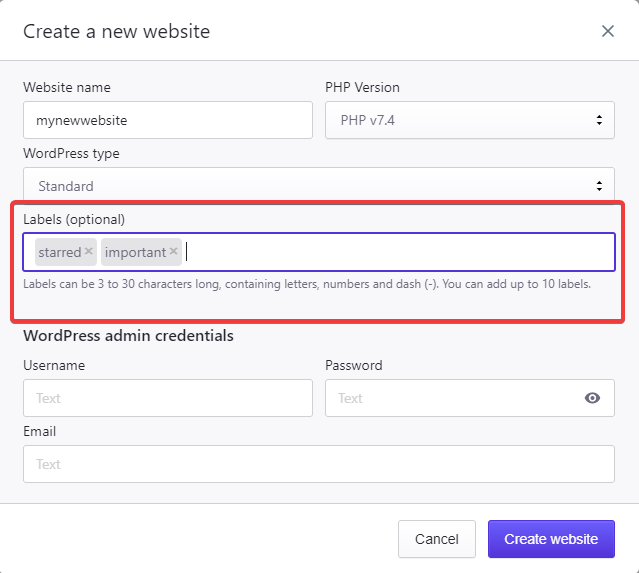
You can also assign labels when creating a new website by filling in, the optional, Labels field on the Create a new website modal.
Labels offer a high level of flexibility in organizing your websites, you might choose to use these to mark certain sites as high priority or perhaps to schedule maintenance on them. However you use them is entirely up to you!
NOT ANSWERED YOUR QUESTION? SEARCH AGAIN OR SUBMIT A SUPPORT REQUEST

