To access your WordPress site via SFTP you will need to have an SFTP client installed as well as the following information:
- SFTP Connection details (Host, Port, Path) to configure your SFTP client of choice.
- An SFTP user (user name, password combination).
Configure SFTP using the Pressidium Dashboard
- Select the Websites menu option from the Dashboard sidebar.
- Click on your website’s name to go to the website overview.
- Navigate to the SFTP page by clicking the link on the navigation bar.
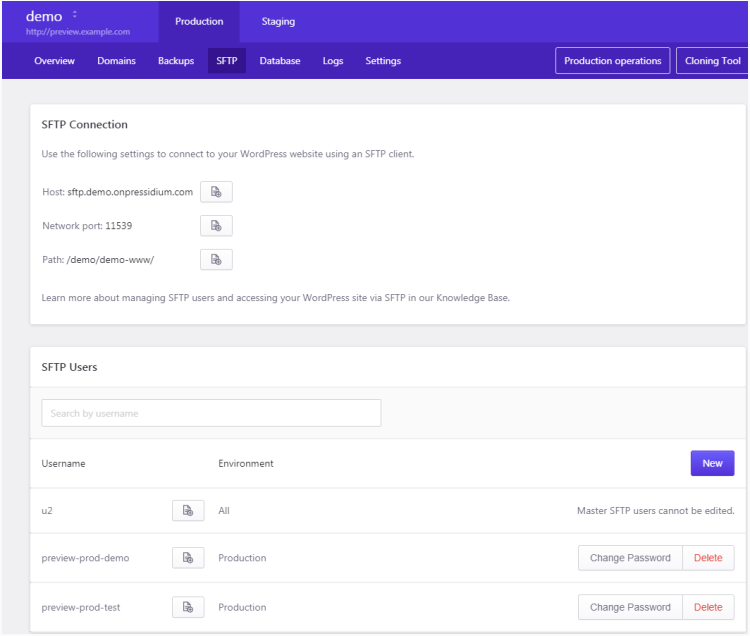
Note / Copy the SFTP Connection details, they are required to configure your SFTP client:
- Host
- Network port
- Path
Create a new SFTP user (you can skip this step if you have already created a user):
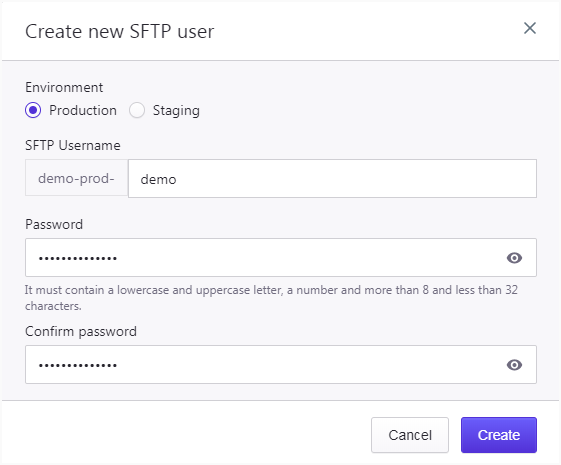
- Click New.
- Select Environment (Production or Staging) to grant access to the production or staging environment respectively. A user can only access files and data of the selected environment.
- Provide a User name and a Password. A strong password (mixed lower case and uppercase Latin characters, numbers and special characters) is recommended. Make a note of the user name and password, you will need them to configure the SFTP client later on.
- Click Create to create the user.
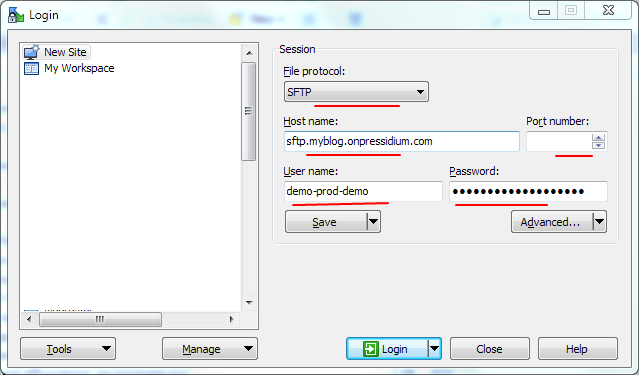
Configure your SFTP client with the following settings :
- Protocol: SFTP
- Host: sftp.yourWordPressSiteName.onpressidium.com
- Port: <the network port from SFTP Connection details>
- Username: <user name of the SFTP user>
- Password: <password of the SFTP user>
Example of connecting to myblog using WinSCP (replace settings with your own):
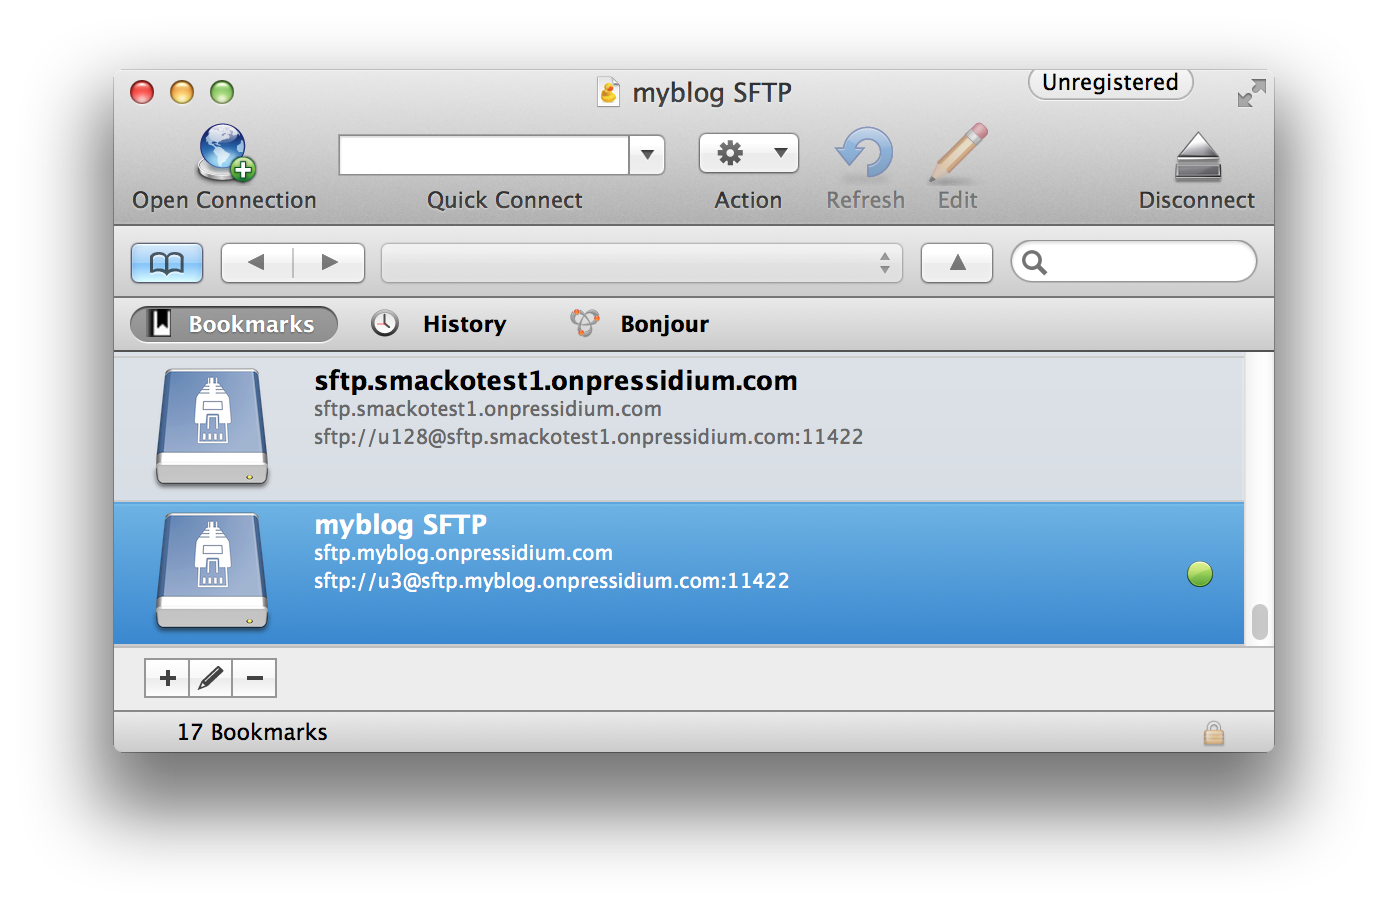
Example of connecting to myblog using Cyberduck (replace settings with your own):
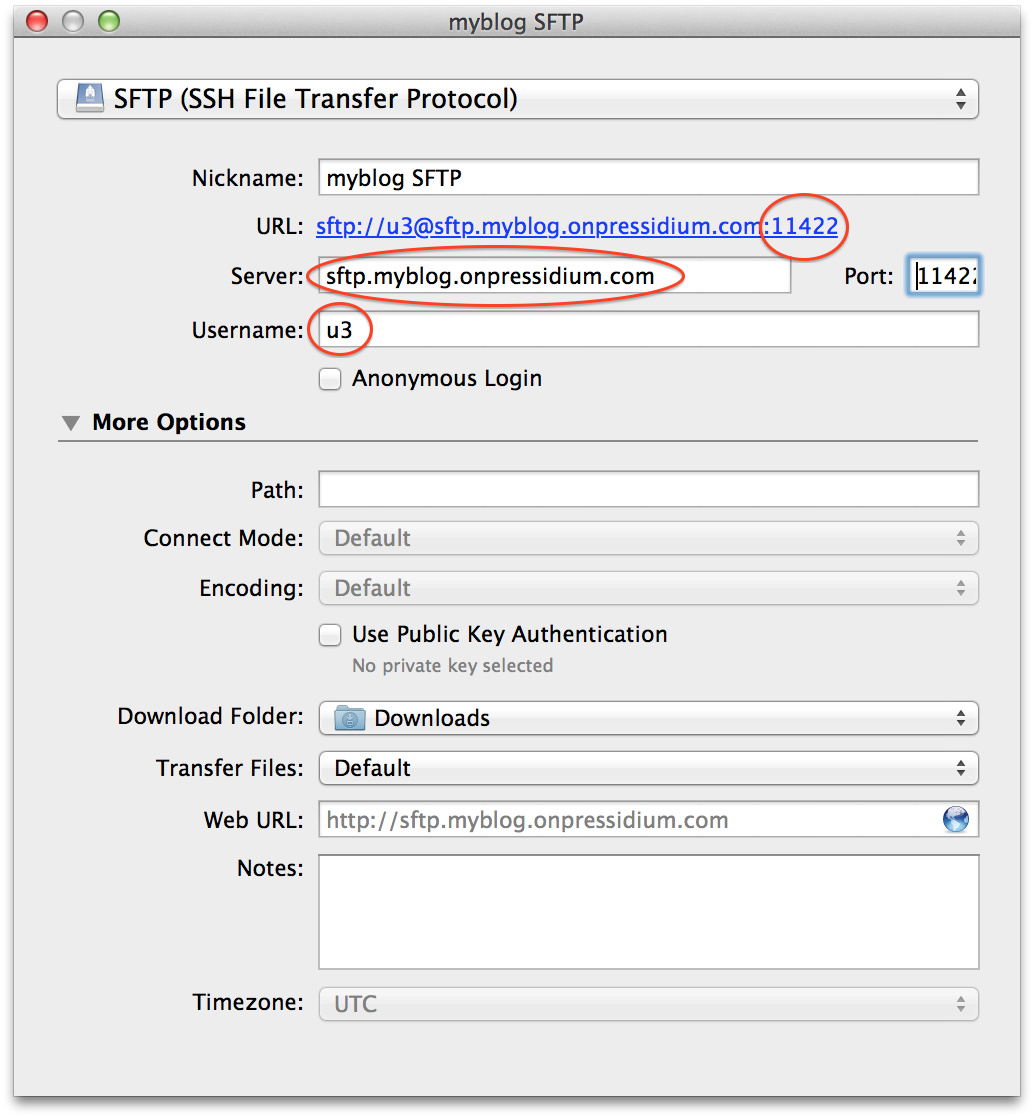
Select your entry in the bookmarks list, and then click the Open Connection button.
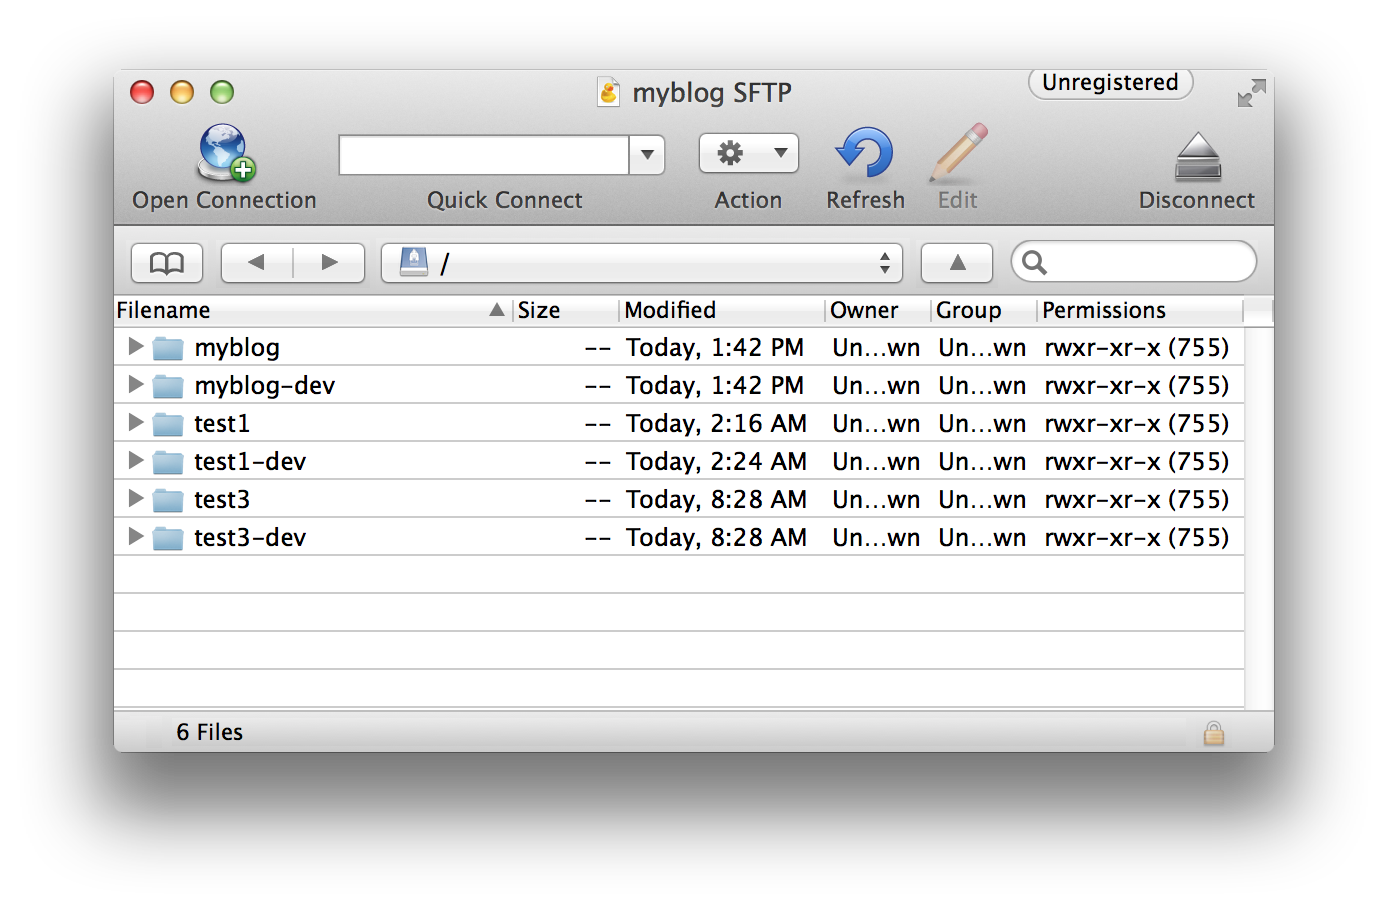
If all went well, a similar window will appear, listing your account’s directory files:
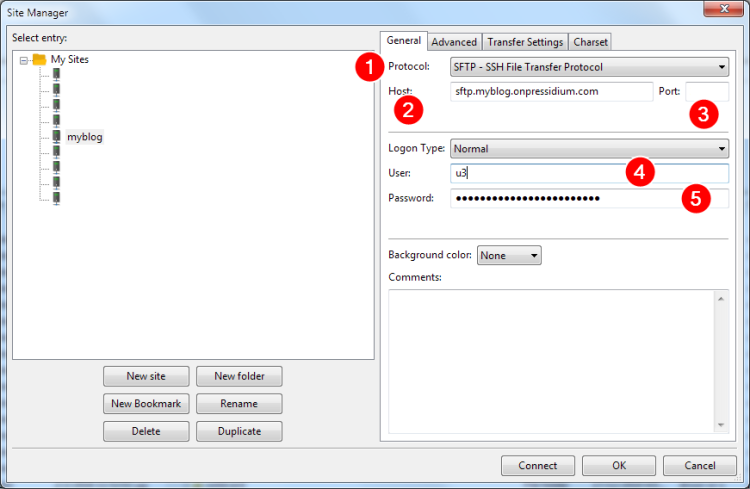
Example of connecting to myblog using FileZilla (replace settings with your own):
- Open Site Manager
- Create a New site (e.g. myblog).
- Fill in the connection details (Protocol, Host, Port, Username, Password)
- Click Connect
SFTP client software
- Transmit (Mac)
- Filezilla (Mac OS X / Linux / Windows)
- WinSCP (Windows)
- Forklift (Mac)
- OpenSSH SFTP Client (Mac OS X / Linux)
Notes
- If you try to modify (i.e. write or update) WordPress core files via SFTP you will get an access denied error. This is expected since WordPress core is managed by our platform and any direct modifications are not allowed.
- Ensure that you have entered the Network port number displayed in your website’s SFTP settings. Many SFTP clients by default set this port number to 22 and if not changed to the correct one, a connection cannot be established.
- If after uploading files via SFTP you need to fix your file permissions, then please read our How to reset file permissions support article.
NOT ANSWERED YOUR QUESTION? SEARCH AGAIN OR SUBMIT A SUPPORT REQUEST

